New to Stripe? Start here
Stripe is a separate company that handles card payments for websites. It is not part of AiWebInfra. A website cannot take a card payment by itself. When a buyer pays, Stripe takes the money from their card and pays it into your bank account.
Signing up with Stripe is free. Stripe takes a fee from each sale, before the money reaches your bank. Stripe’s pricing page shows the fee where you are. AiWebInfra takes no share of your sales.
When you press Accept cards, Stripe’s own pages open in a new tab. You fill them in there, with Stripe. When you finish, Stripe sends you back to AiWebInfra, and your editor is still open in the first tab.
The law makes every company that pays out money check who it is paying, so Stripe asks for your name, date of birth, address and part of your ID number. Your bank details tell it where to send your money.
Filling it in takes about 10 minutes. Stripe usually checks it within minutes; now and then it takes a day or two, or asks for a photo of your ID.
Steps
Have these ready: your legal name, date of birth and home address; the last 4 digits of your Social Security number, or your tax ID (outside the US, your country’s own ID number); a bank account for your payouts; your phone, for a two-step verification code; a photo of your ID, in case Stripe asks to check it; your website address and a line about what you sell.
Press Shop at the top of the left panel, choose Payments, and pick your country in Where is your business based?. Stripe cannot change it later.
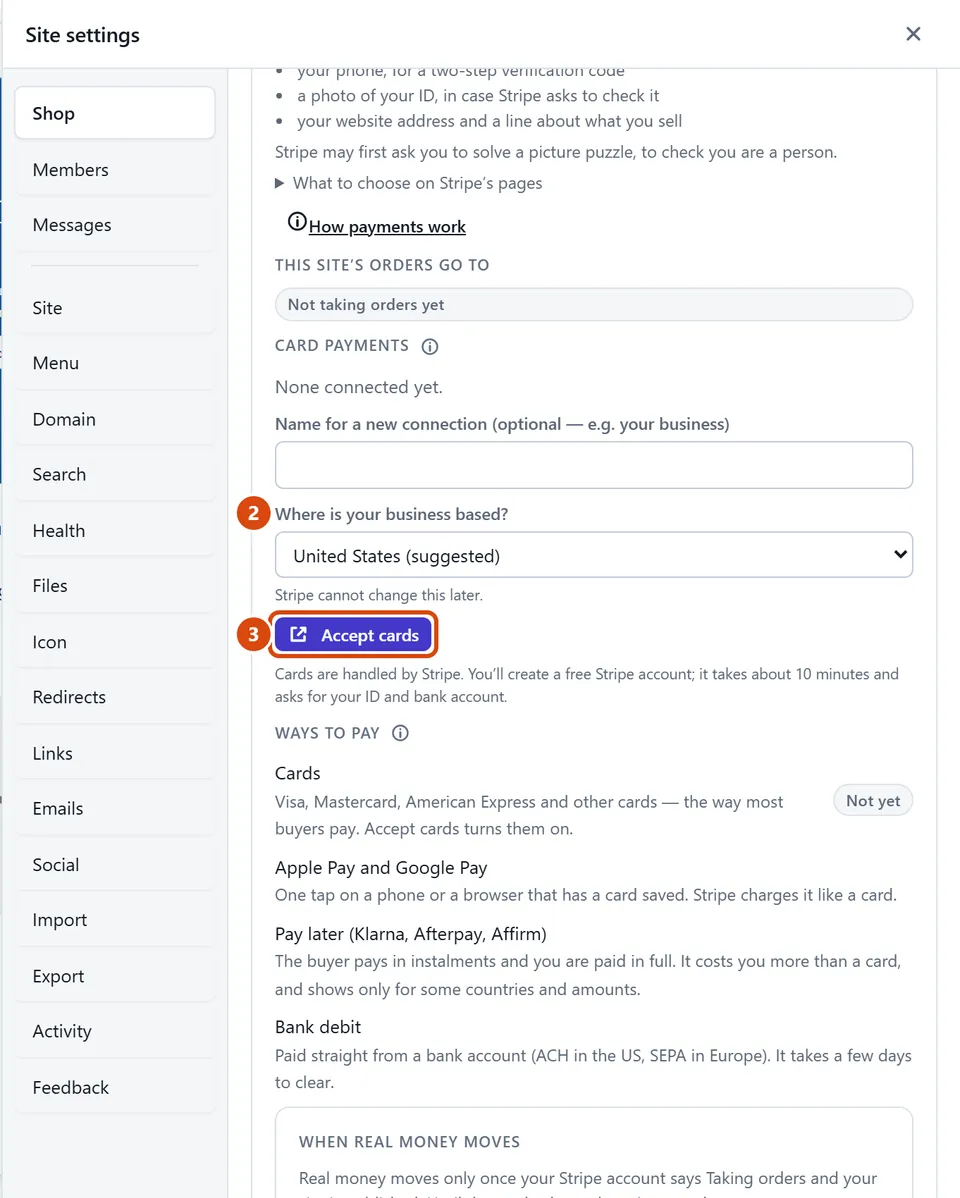
Press Accept cards. Stripe’s own page opens in a new tab: you create a free Stripe account there, give it the details above, and agree its terms with Stripe. We never fill anything in for you.
Filling it in takes about 10 minutes. Stripe usually checks it within minutes; now and then it takes a day or two, or asks for a photo of your ID. Back in Payments, the account says Ready — can take payments once Stripe has checked everything.
If Stripe ever pauses the account, press Finish setting up card payments beside it and give Stripe what it asks for.
Stripe’s pages, one by one
What each of Stripe’s pages looks like, and what to do on it. The pictures come from a practice account, so they show a line at the top that yours will not, and made-up details where yours will be.
Get started with Stripe
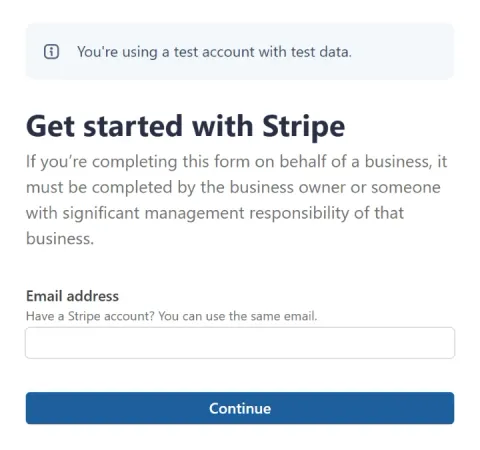
Stripe’s first page asks for your email. If you already have a Stripe account, use its email.
Stripe may then show a picture puzzle, to check you are a person, and send a code to your phone.
Let’s start with your business type
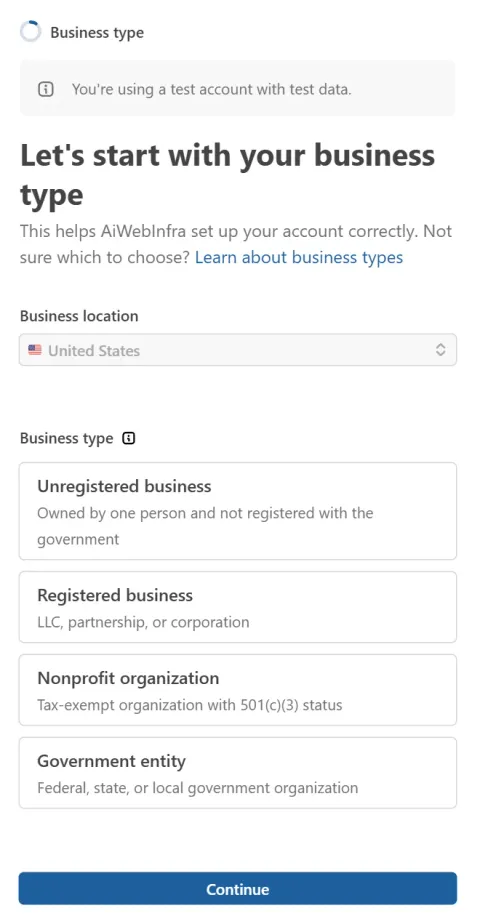
Check the country where your business is based.
If you sell on your own and have not registered a company, choose Unregistered business. Choose Registered business for an LLC, a partnership or a corporation.
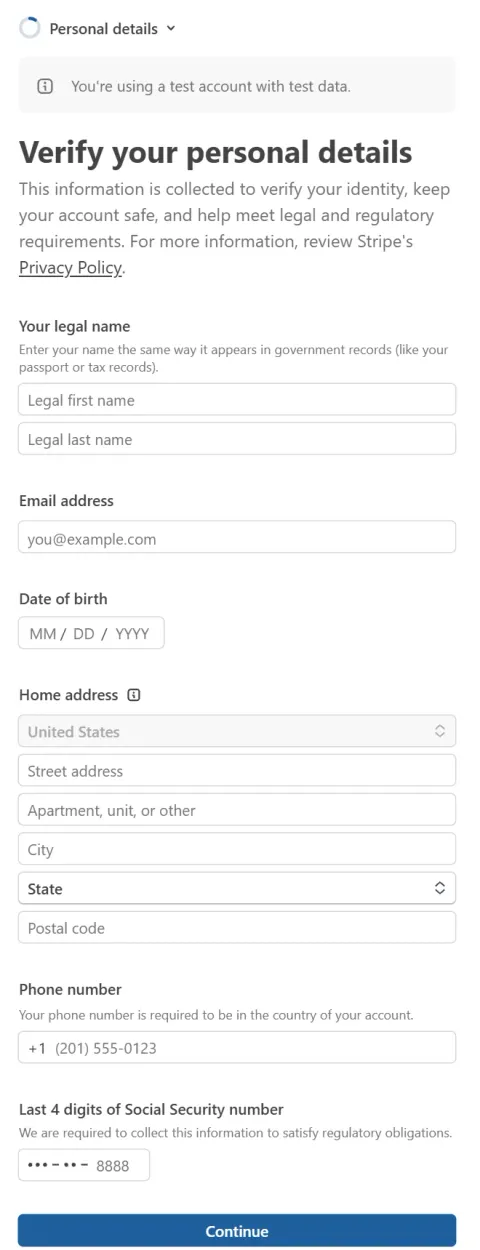
Verify your personal details
Type your legal name as it is on your ID, your email, your date of birth, your home address, your phone, and the last 4 digits of your Social Security number.
Stripe uses them to check who you are. Buyers do not see them.
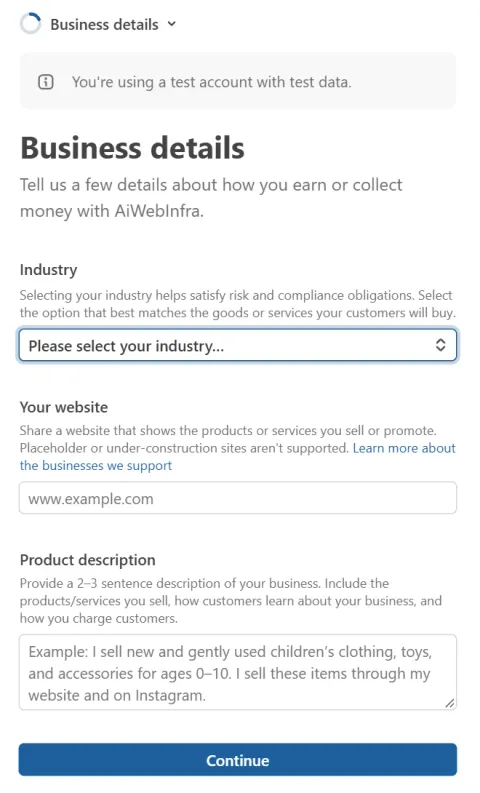
Business details
Industry: pick the kind of thing you sell.
Your website: your site’s address. Stripe may look at it, so put what you sell on it first.
Product description: two or three sentences on what you sell and how buyers find you.
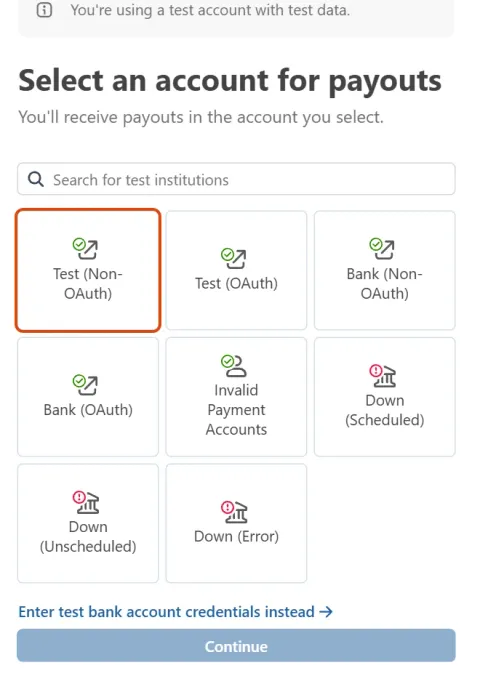
Select an account for payouts
Choose your bank and sign in to it, or type your account details by hand. This is the account Stripe pays your money into.
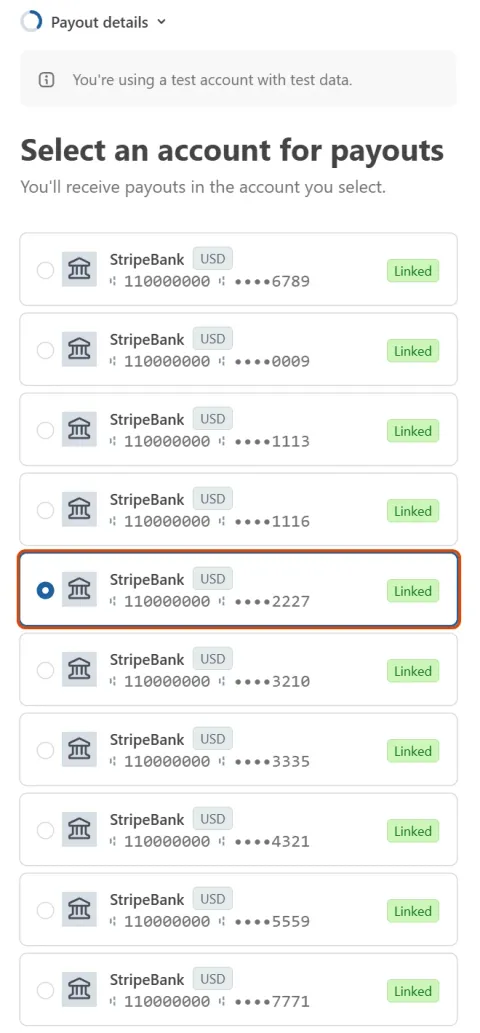
Pick the account Stripe pays into
Stripe lists the bank account you linked. Pick it: in the picture, the chosen one is circled.
Under it, in Select your payout schedule, choose an automatic one: daily, weekly or monthly. Manual means nothing is paid until you ask Stripe each time.
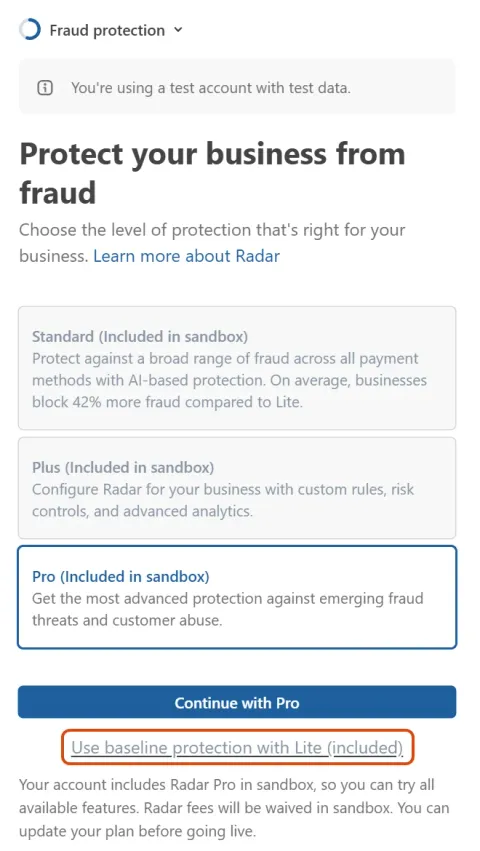
Protect your business from fraud
We suggest Use baseline protection with Lite (included), the link under the blue button. It costs nothing extra.
Standard, Plus and Pro charge for each payment they check. You can change it later in Stripe.
Review and finish
At the end, check the summary, then press Agree and submit.
Stripe then sends you back to AiWebInfra.
What to choose on Stripe’s pages
Statement descriptor: buyers see it on their card statement, so use your shop’s name or web address, so they recognise the charge (Stripe allows 5 to 22 characters, with at least one letter).
Support phone and address: buyers see them on receipts and statements, so use a business phone and address, not your home ones, if you have them.
Payout schedule: we start new accounts on automatic daily payouts. Keep an automatic one (daily, weekly or monthly) so money reaches your bank by itself; manual waits until you send each payout from Stripe.
Fraud protection: we suggest “Use baseline protection with Lite (included)” to start. It costs nothing extra and catches the usual card fraud; Standard, Plus and Pro charge for each payment they check (Pro $0.09). You can change it later in Stripe.
Climate (optional): gives a share of every sale to carbon removal. The share Stripe picks for you is real money once you take real payments; press No thanks unless you want to give. You can join later in your Stripe Dashboard.
Tax: monitoring tells you where you owe sales tax and is fine to leave on. The tax category is the usual type of what you sell: physical goods for things you ship or hand over, digital goods for downloads. Stripe Tax is free until you add your first live registration.
At the end, check the summary, then press Agree and submit.
What restricted means
Restricted (shown as card payments paused) means Stripe has stopped the account taking card payments until you give it something — usually a detail it could not check, or one it now needs. Press Finish setting up card payments in Shop › Payments, give Stripe what it asks for, and payments come back by themselves once it has checked.
Stop using an account, or remove it
Stop using it on this site, beside the account in this site’s Payments, unlinks only this site: it stops taking orders at once, and the account stays in your list for your other sites.
Remove this account from AiWebInfra, under the account, takes it off every site. Removing it here unlinks it from AiWebInfra: the sites using it stop taking orders, and the Stripe account stays yours, with its payments and payouts. To close the Stripe account itself, open it at Stripe: Settings › Business › Account details › Close account. Remove it here first: closing it at Stripe first leaves your sites pointing at an account that’s gone. Closing ends your access to its records, refunds and disputes, so close it only when it is no longer needed.
Worth a look in your Stripe account once it is ready
The name on buyers’ card statements: one they will recognise from your site, so a charge never looks strange.
Your business name and branding, which Stripe’s payment page and receipts use.
Email receipts, if you want Stripe to send buyers a receipt for each payment beside your site’s own order email.
Payouts: when Stripe pays your money into your bank.
AiWebInfra takes no percentage of the sales made on your site; your payment processor’s own fee still applies.
Why we never fill in Stripe’s form for you
Your identity, date of birth, tax number and bank details are yours to give, on Stripe’s own page, and Stripe’s terms are yours to agree. Nothing is sent to Stripe before you press Accept cards, and nothing is filled in for you after.
Or ask the Assistant: “Help me set up payments for my shop.” The Assistant says where your shop stands and suggests the next step with its reason; it never connects anything for you.
Tip: Stripe’s own pages are the authority on what it needs; these steps are a guide.
Related: Take card payments · Add a product
Next: Find your way around your Stripe Dashboard
Still stuck? Contact support